Photo Transfer on Wood
In this activity, you’ll learn how to transfer a photo onto a block of wood. You can use any type of wood that you have on hand, as long as it’s smooth, clear, and unvarnished: a board, a box, a pencil case, or a piece of wood you find outside…It’s up to you!
Grade 5-6
Duration : 1 period

Objective
Learn how to transfer photos onto wood.
*Keep in mind that this activity requires one night to let the glue dry.
Guidelines
Watch the video capsule called “Caroline Harrison – Oeuvre” (English subtitles)
Follow the instructions below to learn how to transfer your photo onto wood.
Share your experience with the class.
Material
- A piece of smooth, clear, and unvarnished wood (board, box, pencil case, or found wood)
- One or more photos
- White paper
- Gel acrylic medium (ex., ModPodge)
- Sponge brush
- Sponge
- Wax paper
- Laser printer
Steps
1
Using the laser printer, print the images to be transferred onto a piece of white paper. Keep in mind that the pictures will be inverted when you transfer them: avoid photos with writing on them or invert the image before printing.
Cut the pictures out.
2
Cut a length of wax paper to protect the table while you work.
Place the printed photo onto the wax paper. Apply a generous amount of the gel acrylic medium on the side of the photo with ink on it using the sponge brush.
3
Place the photo glue side down onto the block of wood.
4
Using a ruler, smooth out the photo to make sure there aren’t any air bubbles under it.
Let the glue dry overnight.
5
The next day, soak the photo in water using the sponge. Gently scrub off the wet strips of paper and let dry.
Food for Thought
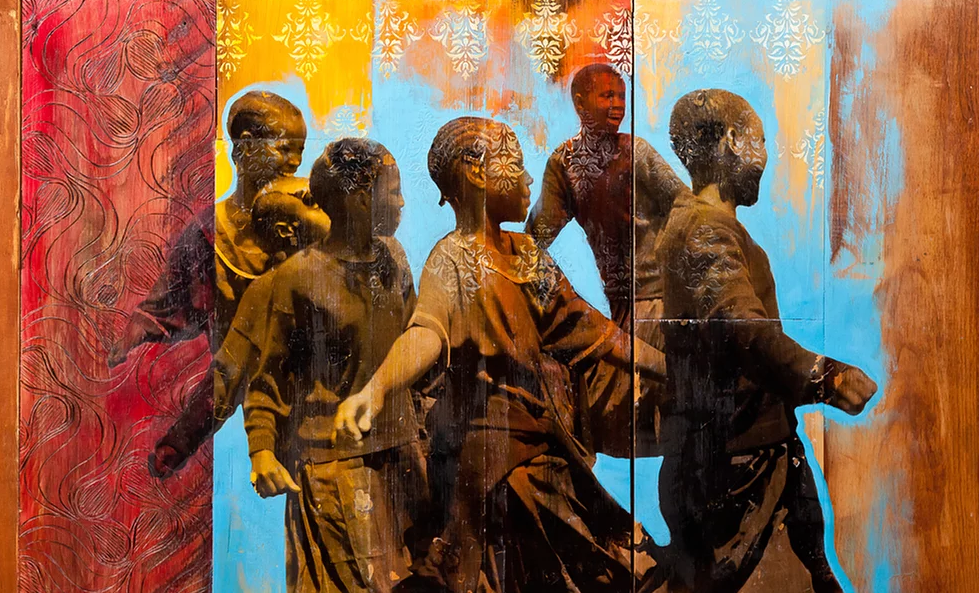
Do you know the artist Shanna Strauss? She often uses photo transfers onto wood as a main feature of her art. This allows her to integrate family photos and memories into her creations. Click here to explore her work!
Below : artwork by Shanna Strauss taken from her series The Floating Homeland